To upload the Hostiko Material template, you will need to Login to your site where WHMCS is installed through FTP.
Below is a step-to-step guide on uploading the Hostiko Material template through FTP on your WHMCS site.
Step 1: If you’re accessing your site through FTP for the first time then, we will recommend you download Filezilla and install it on your system,
after installation read this. This is a step-by-step guide on how to obtain your FTP credentials and how to connect FileZilla with your website.
Step 2: Once you have connected your site with Filezilla you will be able to access all of your website files here. Now navigate to the Templates folder of
your site. Here you can upload your Hostiko material template file.
Step 3: To upload, locate your Hostiko Material Template folder in the left window as shown below and right-click on it, and upload it in the templates folder.
Now, Hostiko Template is uploaded on your WHMCS site.
How to change the colors of the Hostiko Materials?
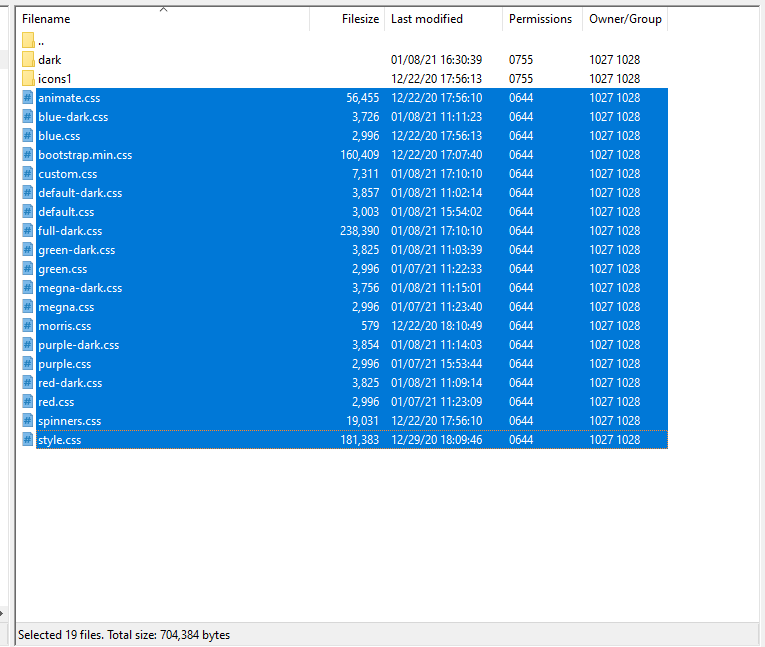
Step 1: Navigate to Hostiko Material > CSS folder.
Step 2: In this folder, you can choose whatever color you want to apply to your Hostiko Materials Template
Step 3: Copy the file name and go back to the Hostiko Material folder main directory. Navigate to the includes folder.
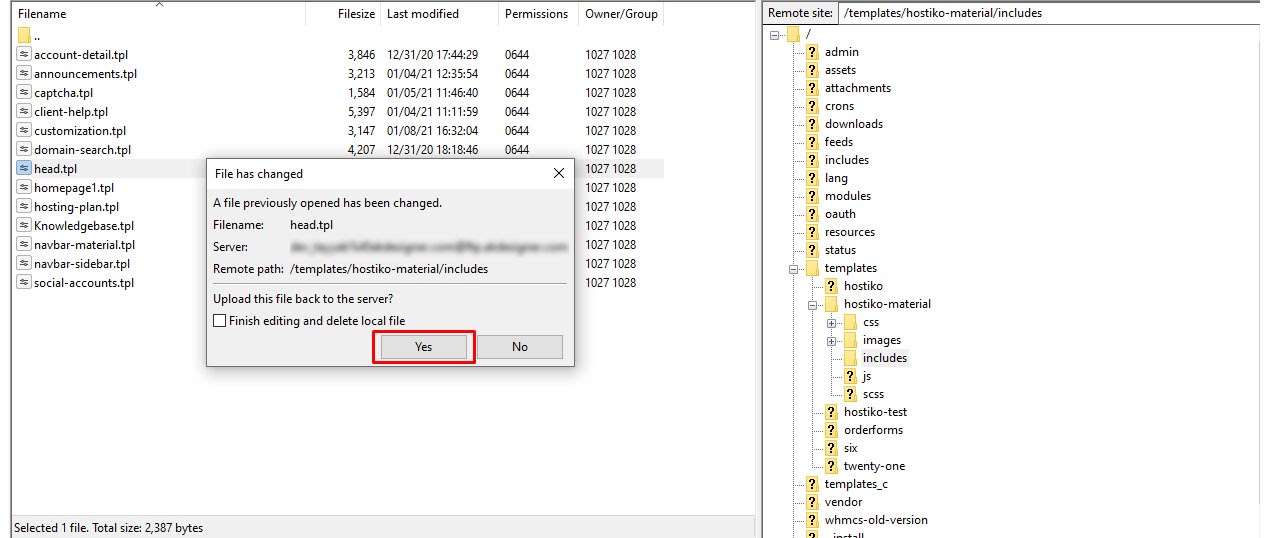
Then locate the head.tpl file and right-click on it and select the View/Edit option.
Step 4: Now your head.tpl file will open in an editor. Here you need to navigate to line 8 and paste the file name you copied earlier in line 8.
Step 5: Save your changes in the file and then go back to FileZilla and click on yes. Now your file changes will upload to your site.
Now your Hostiko Materials Dashboard color will change to the color you chose for example blue is the color we chose as shown below.
How to apply a dark theme on Hostiko Materials?
Step 1: Navigate to Hostiko Material > CSS folder.
Step 2: In this folder, you can choose which dark theme you want to apply to your Hostiko Material Template.
If you want a completely dark theme then copy file name full-dark.css .
Step 3: Copy the file name and go back to the Hostiko Material folder main directory. Navigate to the includes folder.
Then locate the head.tpl file and right-click on it and select the View/Edit option.
Step 4: Now your head.tpl file will open in an editor. Here you need to navigate to line 8 and paste the file name you copied earlier in line 8.
Step 5: Save your changes in the file and then go back to FileZilla and click on yes. Now your file changes will upload to your site.
Now your Hostiko Materials will have a dark theme.
How to setup Hostiko Material RTL?
Step 1:Navigate to Header.tpl file in Hostiko Material template folder.
Open the file in your code editor by right-clicking on the file and choosing View/Edit .
Step 2: After opening the file, locate Line Number 11 .
Step 3: Next, in line number 11 after card-no-border add text rtl-demo as shown in the image below.
Step 4: Save your changes in the file and then go back to FileZilla and click on Yes . Now your file changes will upload to your site.
Step 5: Now your Hostiko Material Dashboard will look like this.
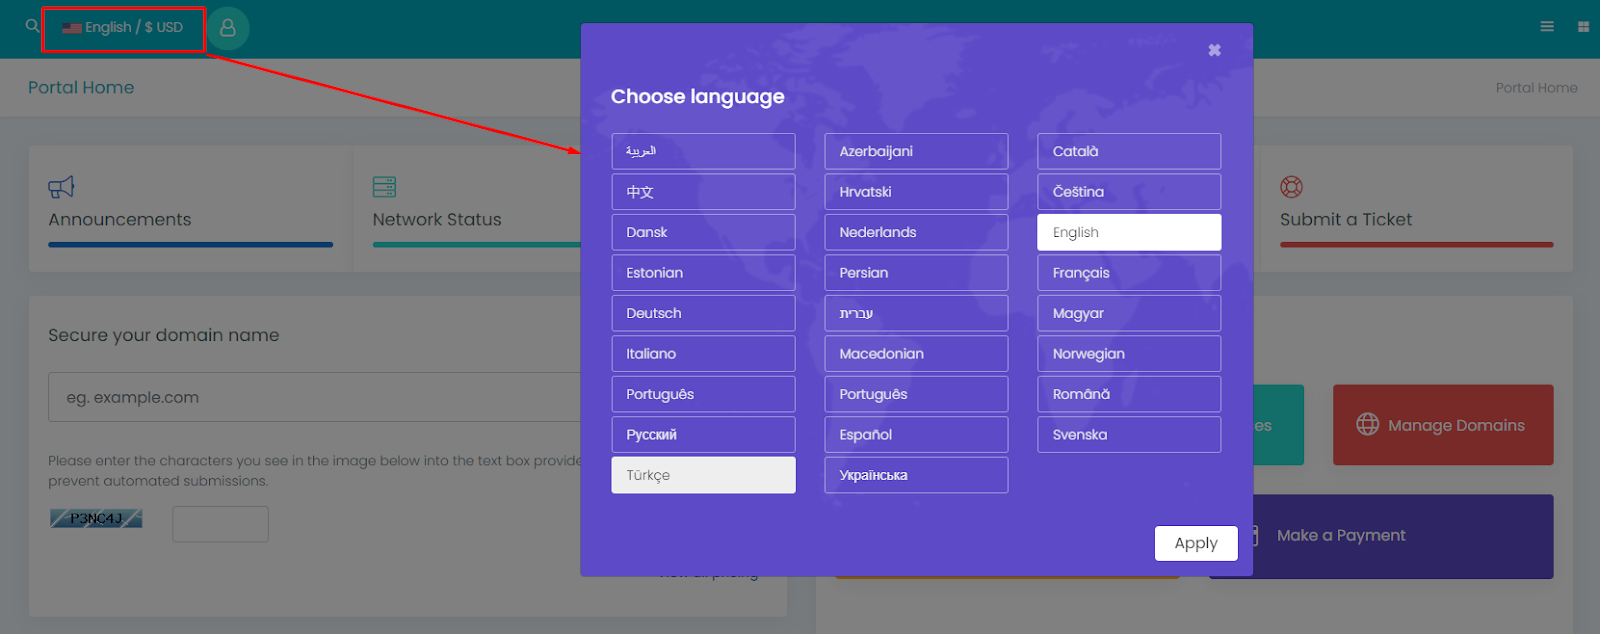
Step 6: Now on the top left corner you will see the English/$ USD option click on it to change your language.
How to setup Mini Sidebar in Hostiko Material?
Step 1:Navigate to Header.tpl file in Hostiko Material template folder.
Open the file in your code editor by right-clicking on the file and choosing View/Edit .
Step 2: After opening the file, locate Line Number 11 .
Step 3: Next, in line number 11 after card-no-border add text mini-sidebar as shown in the image below.
Step 4: Save your changes in the file and then go back to FileZilla and click on Yes . Now your file changes will upload to your site.
Step 5: Now your Hostiko Material Dashboard will look like this.
How to change the Mini Logo in Hostiko Materials?
Step 1: Navigate to the Images folder in Hostiko Materials FTP.
Step 2: Navigate to your logo file in a left side window and right-click on it and select Rename .
Step 3: Now rename your logo to logo-icon.png . If your logo is in a Jpeg format then convert it to png and then rename it.
Step 4: Now right-click on your logo file and select Upload . Now your logo file is updated in Hostiko Materials .
How to remove Customiser button
Step 1: Navigate to the folder in Hostiko Materials FTP.
Step 2: Edit the header.tpl and go to line number 399 and 407
Step 3: Delete these lines and update the file.
Hostiko WHMCS FAQ's
How to change Hostiko WHMCS Layout?
To change the Hostiko WHMCS layout, you will need to Login to your site where WHMCS is installed through FTP.
Below is a step-to-step guide on changing the Hostiko WHMCS layout through FTP on your WHMCS site.
Step 1: If you’re accessing your site through FTP for the first time then, we will recommend you download Filezilla and install it on your system,
after installation read this. This is a step-by-step guide on how to obtain your FTP credentials and how to connect FileZilla with your website.
Step 2: Once you have connected your site with Filezilla you will be able to access all of your website files here. Now navigate to the Templates folder of
your site. This is the folder where your Hostiko WHMCS layouts are placed.
Step 3: In Templates folder, navigate to Hostiko folder.
In Hostiko folder, locate header.tpl file and right-click on it and select the View/Edit option.
Step 4: In header.tpl, navigate to line number 21.
In Line 21 , after layouts/ change wp-50/header50.tpl and add the number of the layout to whatever layout you chose, e.g If you choose layout 30 then
it will be wp-30/header30.tpl As shown in the screenshot below.
Step 5: Save your changes in the file and then go back to FileZilla and click on Yes to save changes to your file.
Step 6: Now, navigate back to Hostiko folder, and locate footer.tpl file and right-click on it and select the View/Edit option.
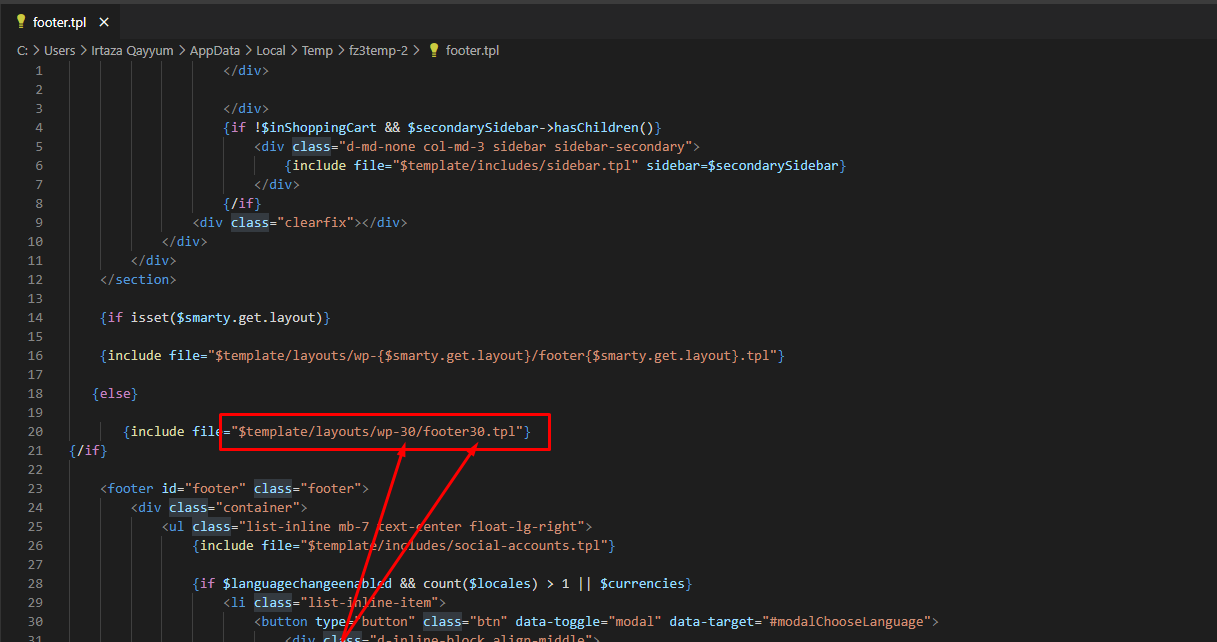
Step 7: In footer.tpl, navigate to line number 20.
In Line 20 , after layouts/ change wp-50/footer50.tpl and add the number of the layout to whatever layout you chose, e.g If you choose layout 30 then
it will be wp-30/footer30.tpl As shown in the screenshot below.
Step 8: Save your changes in the file and then go back to FileZilla and click on Yes to save changes to your file.
Step9: Now, navigate back to Hostiko folder, and locate includes folder.
Step10: In includes folder, locate head.tpl file and right-click on it and select the View/Edit option.
Step 11: In head.tpl, navigate to line number 14.
In Line 14 , after layouts/ change wp-50/override50.css and add the number of the layout to whatever layout you chose, e.g If you choose layout 30 then
it will be wp-30/override30.css As shown in the screenshot below.
Step 12: Save your changes in the file and then go back to FileZilla and click on Yes to save changes to your file.
Now go back to your site and you will see your Hostiko WHMCS Layout is set on your site. As shown in screenshot below Layout 30 is set.
How to change Logo in Hostiko WHMCS Layout?
Step 1: Navigate to the layouts folder in Hostiko FTP.
Step 2: In layouts folder, select the Hostiko WHMCS Layout you're using on your site. As shown in screenshot below we are using layout 30, so we'll select wp-30 folder.
Step 3: In your layout folder, navigate to assets folder.
In assets folder, select images folder.
Step 4: Now, navigate to your logo file on your computer in left side window and right-click on it and select Rename .
Step 5: Now rename your logo to logo30.png . If your logo is in a Jpeg format then convert it to png and then rename it.
Step 6: Now right-click on your logo file and select Upload . Now your logo is updated in your Hostiko WHMCS Layout on your site.
How to change Links in Hostiko WHMCS Layout?
Step 1: In your Hostiko WHMCS Layout you will need to link your pages in header navigation bar.
Step 2: Now to change links in your header, navigate to the layouts folder in Hostiko FTP.
Step 2: In layouts folder, select the Hostiko WHMCS Layout you're using on your site. As shown in screenshot below we are using layout 30, so we'll select wp-30 folder.
Step 3: In your layout folder, navigate to header file like header30.tpl file in layout 30 and right-click on it and select the View/Edit option.
Step 4: Now in your header file , you can add links to each page in your navigation bar. Just find that navigation heading and in < a > tag, add your page link in
href=" " attribute by removing # . For example: If you want to change domain page link then go to line 49 as show in screenshot below.
Step 5: Now in your Hostiko WHMCS Layout you will need to add link in your footer.
Step 2: Now to change links in your footer, navigate to the layouts folder in Hostiko FTP.
Step 2: In layouts folder, select the Hostiko WHMCS Layout you're using on your site. As shown in screenshot below we are using layout 30, so we'll select wp-30 folder.
Step 3: In your layout folder, navigate to footer file like footer30.tpl file in layout 30 and right-click on it and select the View/Edit option.
Step 4: Now in your footer file , you can add links to each page in your page footer. Just find that footer heading and in < a > tag, add your page link in
href=" " attribute by removing # . For example: If you want to change Shared Hosting page link then go to line 19 as show in screenshot below.